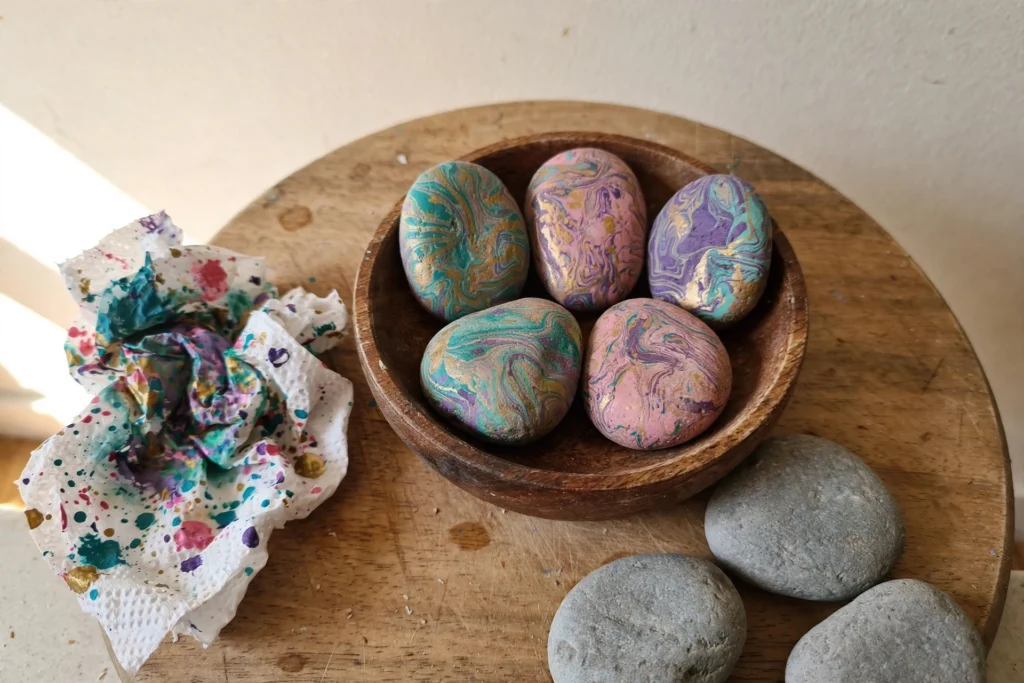
There's something almost magical about watching drops of color spread across water and turn into swirling ribbons. These magic swirl stones use a water-marbling trick to decorate smooth river rocks, and no two ever come out the same. My kids treat each one like a discovered treasure.
We make these on slow weekend afternoons when everyone needs a little calm. The dipping is quick, the results are instant, and the stones end up displayed all over our house — on the windowsill, next to the plant, in the little dish by the front door where they "guard" the house.
Why You'll Love Making This
The water does most of the art for you, which is exactly why kids love it. You drip color onto the water, swirl it with a toothpick, dip a stone through it, and out comes this gorgeous marbled pattern. There's a little gasp moment every single time. Even my "I'm bored with everything" phase kid is all in for this one.
I also love that the finished stones become keepsakes. They're weighty and smooth and pretty, so kids actually keep them instead of forgetting them in a drawer. They make sweet little handmade gifts too — grandma got a set of three last Mother's Day and still has them on her coffee table.
Materials You'll Need
- Smooth river stones: flat ones are easiest to handle
- Washable non-toxic craft paint: 2 to 3 colors your kids love
- Room-temperature water: enough to fill a bowl
- An old bowl or disposable container: don't reuse it for food afterward
- Toothpicks or wooden skewers: for swirling
- Paper towels or scrap cardboard: for drying the stones
- Disposable gloves: optional, keeps little hands paint-free
- Clear craft sealer: optional, for extra shine
- Wash the stones with soap and water and let them dry completely.
- Cover your table with paper and fill the old bowl with room-temperature water.
- Squeeze a few drops of your first paint color onto the water's surface and watch it spread.
- Add drops of your other colors, working fairly quickly.
- Gently drag a toothpick through the floating colors a few times to make swirls. Don't over-stir.
- Hold a dry stone and lower one side through the floating color pattern, then lift it straight out.
- Set the stone on paper towels to dry, decorated side up.
- Skim any leftover paint off the water with a toothpick before adding fresh drops for the next stone.
- Once fully dry, brush on clear sealer if you want a glossy, protected finish.
Step-by-Step Directions
Tips for the Best Swirls
Work quickly once the paint hits the water. The magic window is the first minute or two when the colors still float and flow. If you wait too long, the paint sinks or skins over and the pattern won't transfer.
Start with just two colors. Two-color stones look surprisingly elegant, and it's easier to see how the technique works before you go full rainbow. Pink and turquoise, purple and white, blue and gold — pick a pair and experiment from there.
Fun Variations to Try
Make a matched set in the same color palette but with different swirls — it looks beautiful grouped in a little dish. Try marble-and-gold by adding one metallic paint to the mix. And for older kids who want the vivid nail-polish version, that's a grown-up-supervised project in a well-ventilated room — the classic technique with the same dipping steps.
<p><img src="https://thediynook.com/wp-content/uploads/2026/09/pin-v1-160.webp" alt="Easy Magic Swirl Stones for Kids" /></p>
FAQs
What kind of stones work best?
Smooth, flat river stones from a craft store or a creek walk. The flat surface gives the floating paint more to grab onto, and pale stones make bright colors pop. Give them a good wash first — paint won't stick to dusty or oily stones.
Is this craft safe for young kids?
With washable non-toxic craft paint, yes, and it's one of the better messy crafts because the mess mostly stays in the bowl. Skip the nail-polish version with little ones — that one is for supervised older kids and grown-ups in a ventilated room.
Why is my paint sinking instead of spreading?
Some paints are just heavier than others. Try holding the bottle closer to the water's surface when you drip, use room-temperature water, and test a different color or brand. Thinner craft paints and tempera tend to float best.
Do the stones need to be sealed?
Not for indoor display, but a clear craft sealer makes the colors richer and protects them from scratches. Just make sure the paint is completely dry first, and let a grown-up handle the sealer spray outside.
Can I reuse the water for multiple stones?
Yes — just skim the leftover paint film off the surface with a toothpick between dips. When the water gets too murky, dump it and start fresh. One bowl of water usually covers a whole handful of stones.