There's something almost magical about making your own bouncy balls. You start with a bowl of sticky glue, stir in a few kitchen ingredients, and roll it into a little ball — and then it actually bounces. The first time my daughter dropped hers and it bounced back up, her eyes went huge. "Mom, I MADE that bounce!"
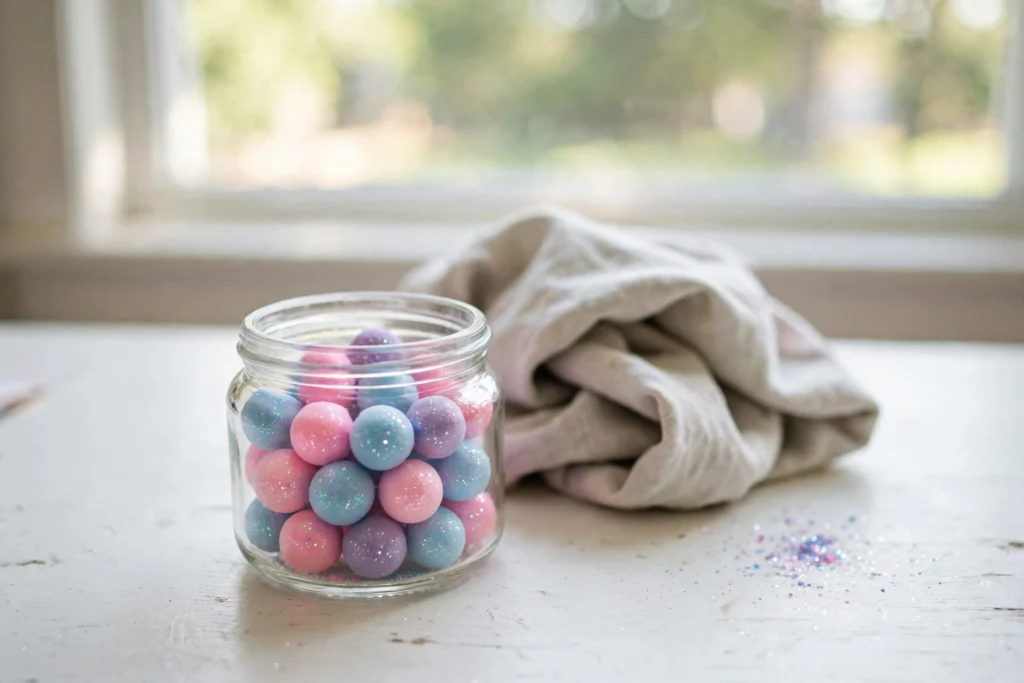
These fairy dust bouncy balls are the pretty version: soft pastel colors swirled with glitter so they shimmer when they catch the light. They're a lovely little sensory toy for quiet play, a fun science-meets-craft project, and they take about fifteen minutes from start to finish.
Why You'll Love Making This
The whole process is deeply satisfying. Mixing the glue, watching it transform from goo to dough, rolling it smooth between your palms — it's one of those crafts that's as fun to make as the finished thing is to play with. My kids each made a whole set in different colors, and the rolling part kept them happily occupied for ages.
And they really work. These aren't sad lumpy balls that roll two inches and stop — they bounce nicely on hard floors. Keep a little jar of them on the desk for fidget breaks, or tuck them into party favor bags. They're one of those crafts that kids keep playing with long after craft time ends.
Materials You'll Need
- White school glue (PVA glue), 2 tablespoons per ball
- Baking soda, 1/4 teaspoon per ball
- Contact lens saline solution (the kind with boric acid)
- Fine glitter or mica powder in soft colors
- Food coloring in pastel shades (optional)
- Small mixing bowl and spoon
- A soft cloth or tray for resting the balls
Step-by-Step Directions
- Pour 2 tablespoons of white glue into a small mixing bowl. Add 1/4 teaspoon of baking soda and stir until completely smooth.
- Add a drop or two of food coloring for a soft tint, then sprinkle in a pinch of fine glitter. Fold it in gently so the glitter distributes evenly.
- Add contact lens solution one drop at a time, stirring after each drop. You'll see the glue start to curl and pull away from the sides of the bowl — that's the magic happening.
- When the mixture feels thicker and less sticky, test it with a clean finger. Still sticking? Add one more small drop of saline. Too firm? Knead in a few drops of water.
- Scoop the mass out and cup it between your palms. Roll slowly and gently until it forms a smooth, round ball.
- Keep kneading and rolling in short bursts until the surface is smooth and the ball feels dense and springy.
- Let the finished ball rest on a soft cloth for 5 to 15 minutes. This helps the inside firm up, and you'll notice a better bounce after the rest.
- Test it with a low bounce on a hard floor. Adjust your next ball's recipe if you want it firmer or springier.
Tips for the Best Bouncy Balls
- Add the saline slowly — this is the step that makes or breaks the texture. A drop too much and the ball gets stiff; too little and it stays sticky.
- Roll with gentle, even pressure. Squeezing hard creates flat spots and cracks.
- If glitter sticks to the bowl instead of the ball, scrape it back in and knead it through.
- Wash hands before rolling each ball so the colors stay clean and bright.
Fun Variations to Try
- Galaxy balls: swirl two colors together without fully mixing for a marbled effect.
- Glow balls: use glow-in-the-dark pigment powder instead of glitter for balls that charge up in daylight.
- Mica shimmer: swap plastic glitter for cosmetic mica powder for an extra-soft, pearly finish.
- Scented balls: a tiny drop of vanilla or strawberry extract in the glue makes them smell as good as they look.
<p><img src="https://thediynook.com/wp-content/uploads/2026/09/pin-v1-186.webp" alt="Easy Fairy Dust Bouncy Balls for Kids" /></p>
FAQs
What ages is this good for?
Best for ages 5 and up with adult supervision. Younger kids can help with the rolling, but the saline solution and the sticky mixing stage need grown-up hands nearby.
Is the contact lens solution safe?
The kind used for crafting contains diluted boric acid, which is what firms up the glue. It's a common craft ingredient, but keep the bottle away from small children and don't let anyone put the balls in their mouth.
What if my ball stays sticky?
Add saline one tiny drop at a time and knead longer. Resting the ball for 15 minutes also helps it firm up. If it's still a sticky mess, the glue-to-saline ratio was off — start a fresh batch and compare.
Can I make these without glitter?
Absolutely. They look lovely in plain pastel colors, and skipping the glitter makes cleanup easier and keeps the craft fully eco-friendly.
How long do they last?
With gentle play and cool storage in a jar or pouch, expect weeks to months. If a ball loses its bounce, try kneading it again with clean hands — a tiny mist of saline can sometimes revive it.
Why didn't mine bounce very high?
Bounce depends on the ratio. More baking soda gives a firmer ball; a little extra saline makes it springier. Tweak in tiny amounts — this is a great little experiment for kids to run themselves.