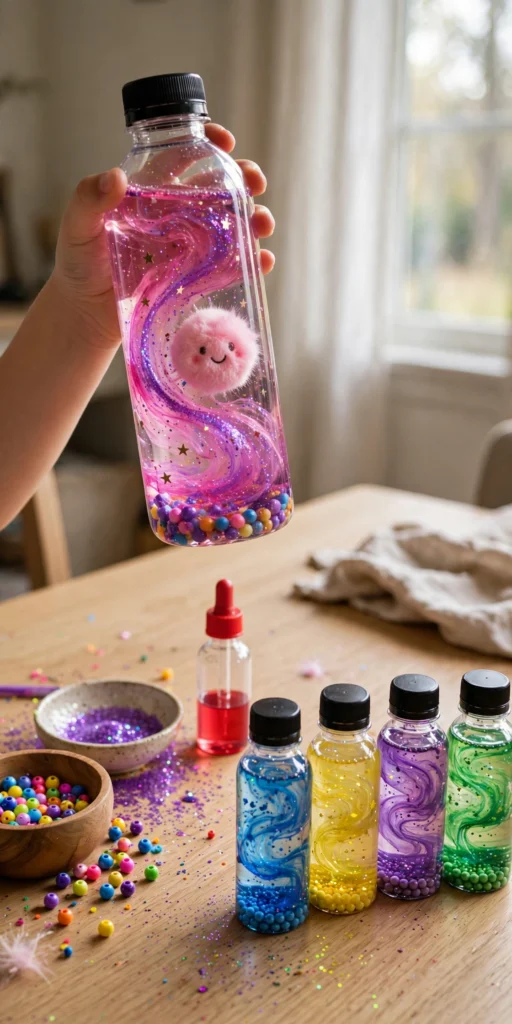
Looking for a craft that's part art project, part science, and 100% mesmerizing? Galaxy bottles are it. You fill a clear bottle with colored water, glitter, and beads, tuck in a little smiley pom-pom "galaxy buddy," and suddenly you have a swirling universe you can hold in your hand.
My two each claimed their own color immediately — one went pink galaxy, the other blue — and they have been shaking and swirling these bottles for days.
Why You'll Love Making This
There is something deeply calming about watching glitter swirl and slowly settle inside a bottle. It's a craft and a calm-down tool in one, which makes it perfect for winding down after school or as a bedtime-table buddy.
Kids also love that there's no wrong way to make one. More glitter? Yes. Extra stars? Absolutely. The galaxy is theirs to design.
Materials You'll Need
- Clear plastic bottles with caps — water bottles or sensory bottles
- Water — to fill each bottle
- Food coloring or liquid watercolors — galaxy colors like purple, blue, pink, teal
- Fine glitter — the more sparkle, the better
- Small beads or pom-poms — for the bottom layer and the galaxy buddy
- Star confetti — tiny stars floating in the water
- Clear glue or glitter glue — a squirt slows the swirl beautifully
- Googly eyes or a marker — to give the pom-pom buddy a face
Step-by-Step Directions
- Fill your clear bottle about three-quarters full with water.
- Add a few drops of food coloring and swirl until you love the color.
- Squirt in a tablespoon of clear glue — this slows the glitter down so it swirls dreamily instead of sinking.
- Sprinkle in a generous spoonful of fine glitter and a pinch of star confetti.
- Drop in a handful of small beads or mini pom-poms for the bottom layer.
- Add your galaxy buddy: a fluffy pom-pom with googly eyes or a drawn-on smiley face.
- Top off with a little more water, leaving a small air gap at the top.
- Screw the cap on tight (a dab of hot glue around the rim keeps it sealed for good) and give it a swirl.
Tips for the Best Results
- Clear glue is the secret ingredient — without it, everything sinks too fast. Don't skip it.
- Hot-gluing the cap shut is worth the extra minute, especially with younger kids who will shake these hard.
- If the water gets too dark, you won't see the glitter — start with just a drop or two of color.
- Distilled water keeps the bottle clearer for longer than tap water.
Fun Variations to Try
- Ocean bottle — blue water, sand at the bottom, tiny shells and fish confetti.
- Snow globe bottle — clear water, white and silver glitter, a tiny winter pom-pom buddy.
- Sunset bottle — orange and pink layers with gold glitter.
- Glow galaxy — add glow-in-the-dark stars so it shines at bedtime.
<p><img src="https://thediynook.com/wp-content/uploads/2026/09/pin-v1-121.webp" alt="DIY Galaxy Bottle for Kids" /></p>
FAQs
What age is this craft good for?
Ages 3 and up with supervision. Little ones love shaking the finished bottle; older kids enjoy designing every layer themselves.
How do I stop the bottle from leaking?
Run a ring of hot glue around the inside of the cap before screwing it on. Once it's sealed, even enthusiastic shaking stays mess-free.
Why is my glitter sinking too fast?
You need more clear glue — it thickens the water and slows everything down. Add another tablespoon and test the swirl again.
Can I use a glass bottle instead of plastic?
Plastic is safer for kids since these bottles get shaken, dropped, and carried everywhere. Save glass bottles for display-only versions.
How long does a galaxy bottle last?
Months! The water may fade slightly over time, but the glitter and beads keep swirling beautifully. If it gets murky, just make a fresh one — it takes five minutes.

 Easy Ocean Saltwater Slime for Kids
 Easy Ocean Saltwater Slime for Kids
 Easy Fairy Dust Bouncy Balls for Kids
Leave a Reply