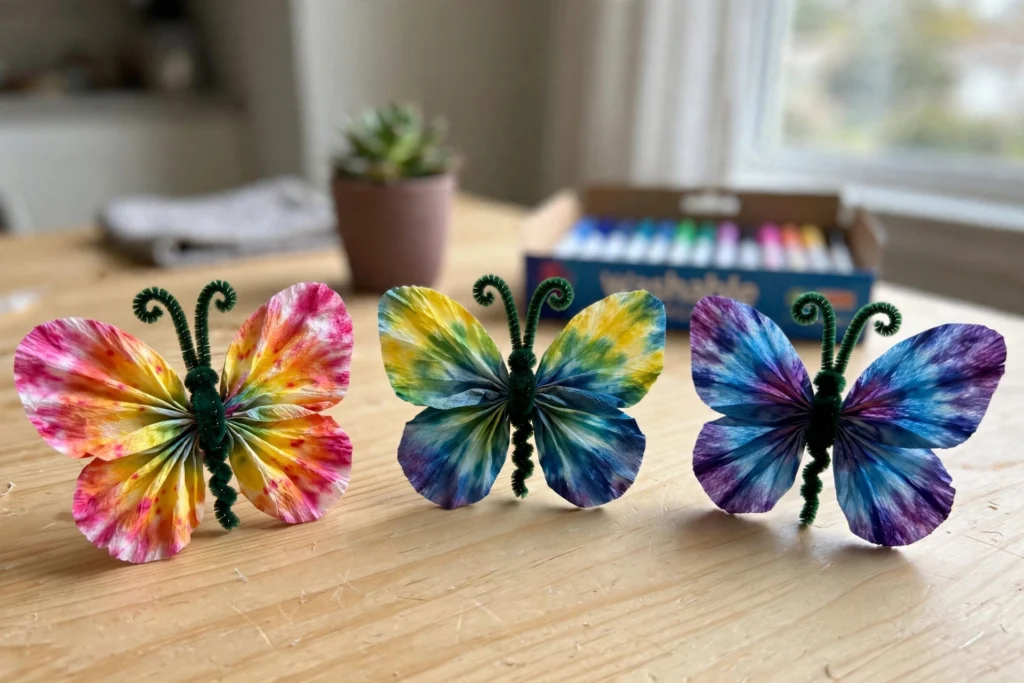
Some afternoons just call for a slower kind of craft — the kind where nobody is racing to finish and nobody is making a giant mess. These coffee filter butterflies are exactly that. You color, you mist with water, and then you get to watch the colors bloom and blend right in front of your eyes. My kids go completely quiet for this one, and honestly, so do I.
The science part is a sneaky bonus. Chromatography sounds like a big word, but all it means is watching colors separate and spread through the filter — and it is genuinely magical to see. We hung our finished butterflies in the kitchen window, and they look like stained glass when the sun comes through.
Why You'll Love Making This
First, it is calming in a way most kid crafts are not. There is something about watching the water carry the colors outward that just slows everyone down. On hectic days, this is the craft I reach for.
Second, it is nearly mess-proof. Washable markers, a little water in a spray bottle, and coffee filters are the whole supply list. No paint cups to knock over, no glitter migrating through the house for the next six months.
Materials You'll Need
- Coffee filters: standard basket-style, a few per butterfly
- Washable markers: lots of bright colors
- Spray bottle: filled with water
- Pipe cleaners: for the butterfly bodies
- Small cups: for water if you want to try dipping instead of spraying
- Newspaper or a tray: to protect your table while spraying
- Scissors: for trimming wings
Step-by-Step Directions
- Lay a coffee filter flat on your tray and color it with washable markers — dots, swirls, and stripes all work beautifully.
- Lightly mist the colored filter with your spray bottle. Watch the colors start to spread and blend.
- Add a little more water if you want the colors to travel further, but stop before the filter gets soggy.
- Let the filter dry completely, either on the tray or clipped to a string like tiny laundry.
- Pinch the dry filter in the middle to form two wings.
- Twist a pipe cleaner around the pinched center to make the butterfly's body, curling the ends up into little antennae.
- Fan the wings out and fluff them into shape.
Tips for the Prettiest Wings
Less water is more at first — you can always mist again, but you cannot un-muddle colors that bled too far. Dark colors like purple and blue make the most dramatic butterflies, and drawing a thick ring of color near the edge gives you gorgeous tie-dye rings. If a butterfly comes out muddy, call it a moth and make another one.
Variations to Try
Cut the dried filters into flower shapes instead of butterflies and glue them onto green straws for a bouquet. Or string a whole flutter of butterflies on fishing line and hang them in a window as a mobile. For a science twist, draw with a black marker and watch it separate into hidden colors — black markers are secretly rainbows.
<p><img src="https://thediynook.com/wp-content/uploads/2026/09/pin-v1-100.webp" alt="Easy Coffee Filter Butterflies for Kids" /></p>
FAQs
What is chromatography, exactly?
It is just a fancy word for separating a mixture into its parts. Here, the water carries the marker ink through the coffee filter, and different colors travel at different speeds — so you get to watch one color split into several.
Can I use food coloring instead of markers?
You can, but markers are easier and less messy for kids. If you do use food coloring, dilute a few drops in small cups of water and use droppers — and expect colorful fingers.
Why did my colors turn brown?
Too many dark colors layered together, or too much water. Stick to two or three bright colors per filter and mist lightly for the clearest results.
How long do they take to dry?
About 20 to 30 minutes at room temperature. A sunny windowsill speeds things up.
Are these safe for toddlers?
Yes, with supervision. The markers are washable and non-toxic, and toddlers love the spraying part — just handle the pinching and pipe cleaner twisting for them.
How do I display them?
Hang them in a window with thread for a stained-glass effect, tape them to a wall in a flutter formation, or clip them onto houseplant stems for a surprise pop of color.

 Easy Cornstarch Bioplastic DIY for Mindful Moments
 Easy Galaxy Crystal Seashells for Kids
 Easy DIY Bubble Lamp for Kids
 DIY Calm Down Bottles for Kids
Leave a Reply