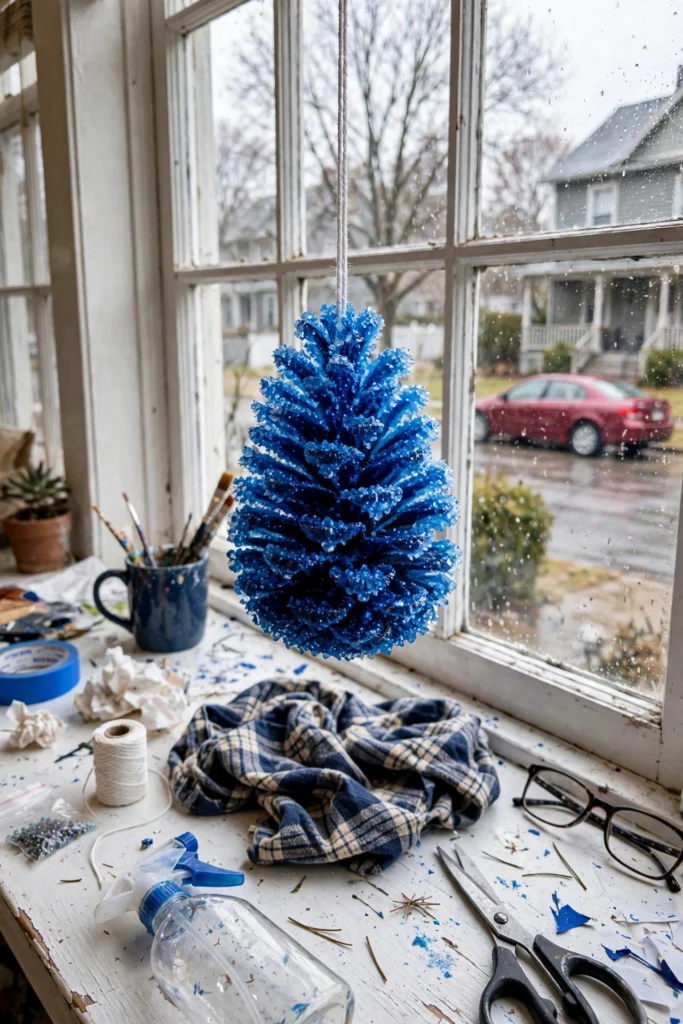
Every January my house goes through that weird letdown — the tree comes down, the lights go in a bin, and suddenly the living room looks naked. A couple of winters ago I needed something cheap and pretty to fill the post-holiday void, and a friend mentioned Epsom salt crystal pinecones. I was skeptical. Then I pulled one out of the freezer and it looked like it had been dipped in actual ice magic.
These frozen crystal pinecones are as easy as soaking a pinecone in Epsom salt water and freezing it. That's the whole trick. A few drops of blue food coloring and they look like something Elsa would keep on her mantel. My kids call them "ice pinecones" and they absolutely refuse to let me put them away before March.
Why You'll Love Making These
This craft has basically no mess, no craft-store run, and the freezer does all the work. You mix, you soak, you freeze, you admire. My youngest was able to do nearly every step herself, and the four-to-six-hour freeze is just long enough to build real anticipation without the overnight agony of some crafts.
Also? They are GORGEOUS in a bowl with some fairy lights. I keep saying I'm going to try a big centerpiece version one year. One year.
Materials You'll Need
- Pinecones — from the backyard, a park, or a craft store
- Epsom salt, about 1/2 cup
- Water, about 2 cups
- Food coloring, a few drops (blue looks like ice, but any color works)
- A mixing bowl
- A tray for freezing
- Ribbon or string if you want to hang them
The Epsom salt is the one thing you might not have — it's in the pharmacy section, cheap, and good for tired-mom foot soaks too. Just saying.
<img src="https://thediynook.com/wp-content/uploads/2026/09/pin-v1-29.webp" alt="Easy Frozen Ice Crystal Pinecones" />
Step-by-Step Directions
- Pour about 2 cups of water into a mixing bowl.
- Slowly add 1/2 cup of Epsom salt and stir until it's completely dissolved. It takes a minute — keep stirring, the patience pays off.
- If you want color, add a few drops of food coloring and stir it in. Blue plus clear ice crystals is my favorite combo.
- Carefully submerge the pinecones in the mixture, making sure they're fully soaked. Tie a string around the tops if you want to hang them later — do it now, not after freezing. Ask me how I learned that.
- Arrange the soaked pinecones on a tray or in a dish, spaced apart so they aren't touching.
- Place the tray in the freezer for at least 4 to 6 hours, until fully solid.
- Take them out and gently shake off the excess salt. Let them sit at room temperature for a few minutes.
- Display them: in a bowl, on the mantel, hanging with ribbon — wherever your winter-decor heart desires.
The Learning Behind This Craft
This is a crystal experiment wearing a winter coat. As the salt water freezes, the Epsom salt forms tiny ice crystals all over the pinecone's scales — and when you bring them out, they stay frosted and sparkly. Kids get to see freezing and crystallization happen on something they touched, which beats any worksheet about states of matter.
My daughter's takeaway was "the freezer is a magic box," which is not scientifically precise, but I let it stand.
Tips If Things Go Sideways
Crystals look sparse? Next batch, use a little more Epsom salt in the water — or refreeze the pinecone after a second soak. They can be refrozen multiple times, which is great.
Pinecones melting and dripping? They're meant for cool spots. Keep them away from heat vents and direct sun — they're winter decor, not summer decor.
Color too faint? Add more drops of food coloring to the soak. You can't really overdo it.
One of ours froze to the tray — we just ran a little warm water under the tray and it popped right off. No casualties.
Fun Variations to Try
- Use different colors in separate batches and mix them in one display for a marbled rainbow effect.
- Try twigs or acorns in the same soak for a varied winter display.
- Swap Epsom salt for sparkling sugar for a glittery finish instead of an icy one.
- Hang them from a branch arrangement with ribbon for a natural winter centerpiece.
- Make them a family activity — everyone picks a color for their pinecone.

FAQs
Can I use regular table salt instead of Epsom salt?
You can, but the crystals look different — Epsom salt gives that beautiful icy, sparkly texture. Table salt is more granular.
How long do I freeze them?
Four to six hours works well. You can leave them longer for a sturdier ice structure.
Can I keep them indoors?
Yes, as long as it's a cool spot. They'll last through the winter season stored in a cool, dry area away from direct sunlight and heat.
What if mine don't look like the pictures?
Every batch is different — embrace it. Try adjusting the water-to-salt ratio, or do a second soak and refreeze. Some of our "failed" ones are my favorites.
Can I reuse the pinecones?
Yes! Just soak them again in the salt solution and refreeze for a fresh batch of icy beauty.

 Sunflower Chocolate Mother’s Day Card
 Easter Footprint Keepsakes: Easy Toddler Craft
 DIY Ghost Costume for Kids: Easy No-Sew Halloween Costume
 Easy Rainbow Glow Ghost Mason Jar Lanterns for Kids
Leave a Reply