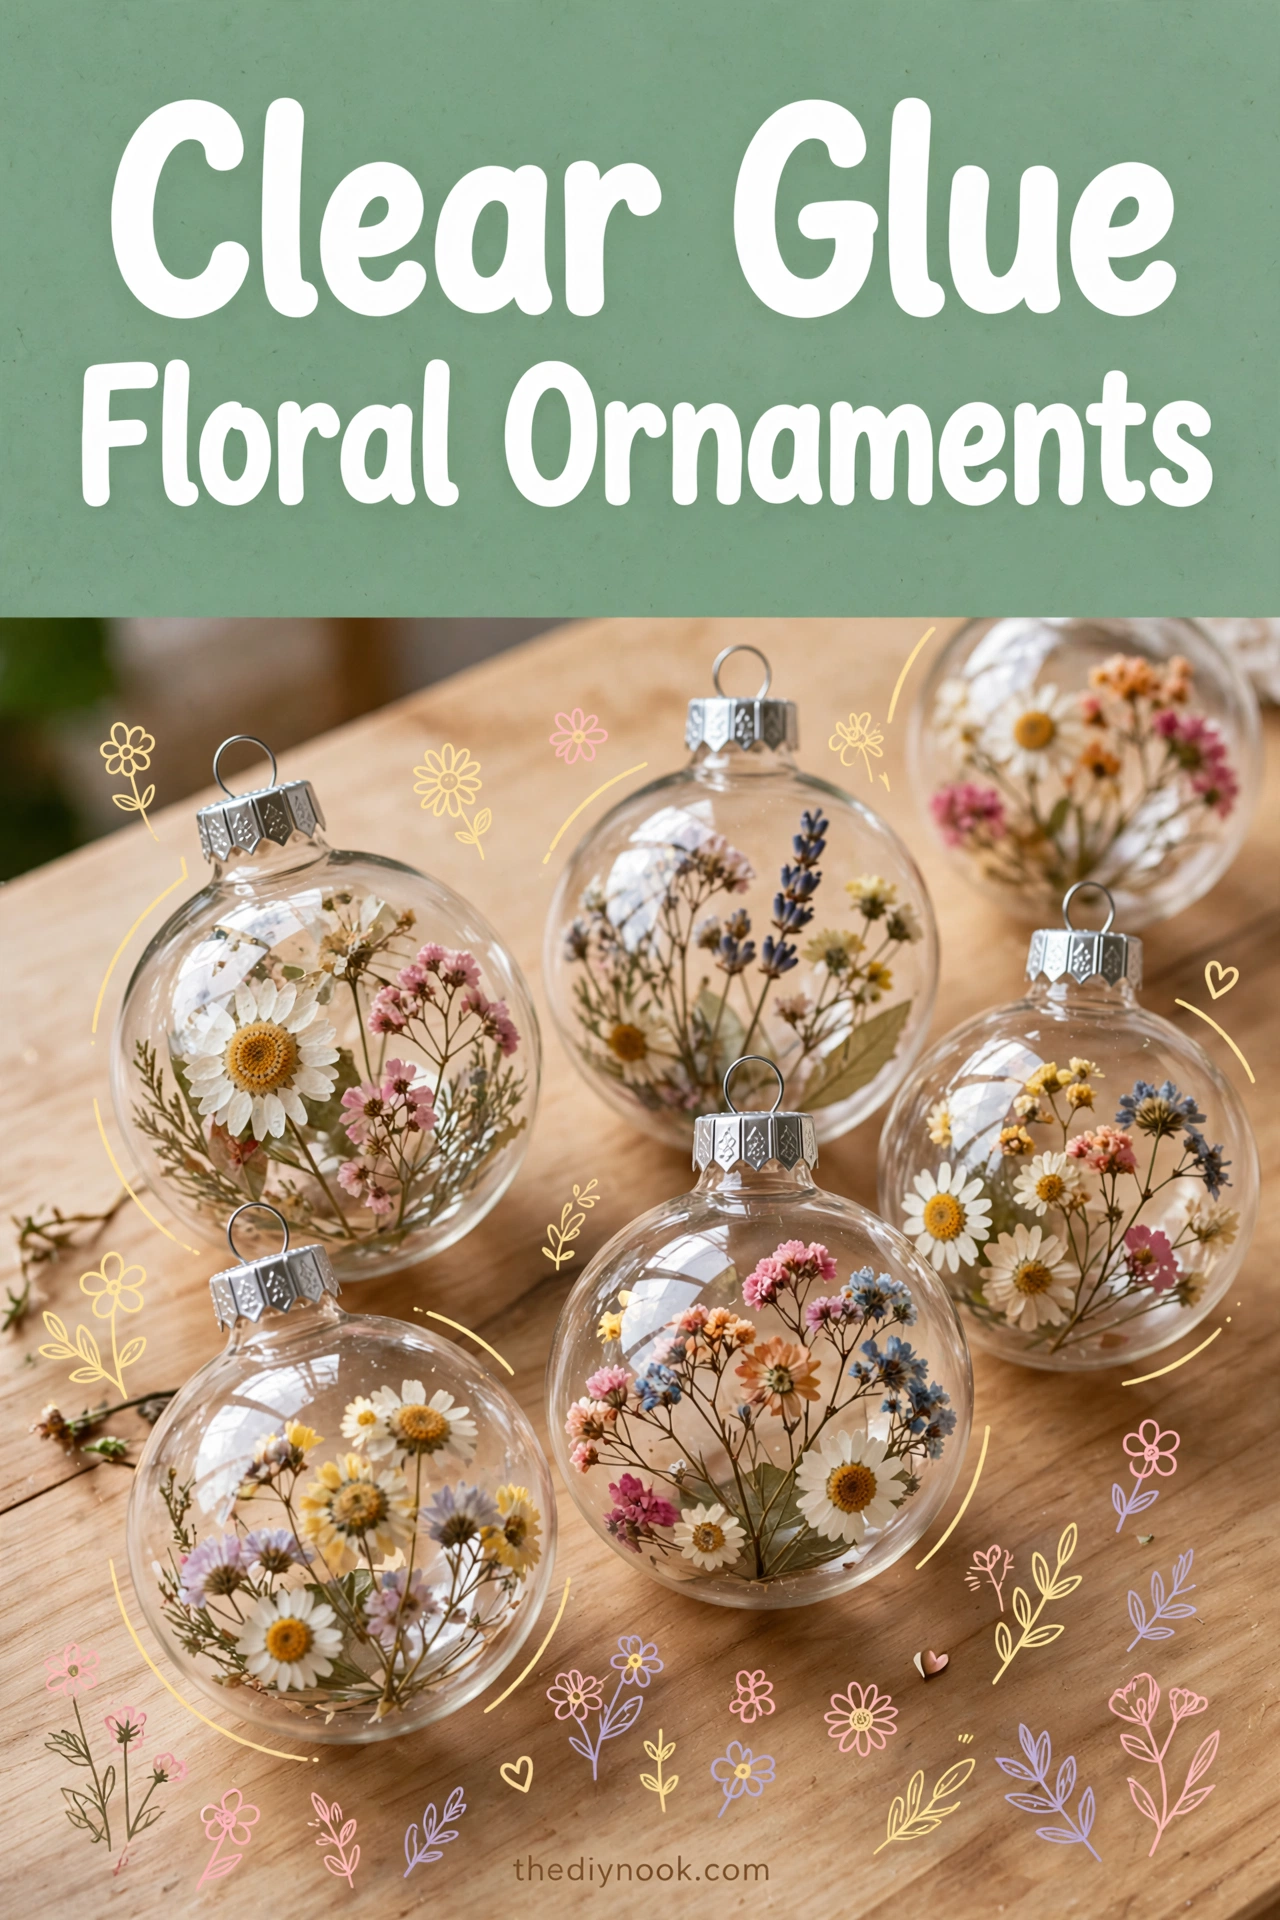
I found a bag of dried flowers at a craft store clearance bin — the kind of impulse buy that sits in a drawer for six months until it becomes a project. One quiet afternoon, while the kids were deep in a LEGO situation and the house was actually peaceful, I pulled them out and started gluing them into clear ornaments.
It might be the calmest craft I've ever done. Brush on glue, place a flower, seal it in. No heat, no mess, no ticking clock. The finished ornaments look like little botanical specimens suspended in glass, and I keep catching myself just… holding one up to the light. There's something about flowers preserved mid-bloom that feels like bottling a small piece of summer for December.
Why You'll Love Making These
This is the anti-chaos craft. Everything moves at your pace, the materials are gentle, and there's no step where things can go dramatically wrong. If your December has been loud and frantic, this is the craft equivalent of a deep breath.
It's also a gorgeous way to preserve flowers with meaning — blooms from a birthday bouquet, wildflowers the kids picked in June, petals saved from a special occasion. These ornaments turn memories into something you hang on the tree every year.
Materials You'll Need
- Clear glue (the regular craft kind, easy to find)
- Dried flowers and petals in assorted colors
- Clear glass ornaments with a smooth surface
- A small paintbrush or sponge for applying glue
- Scissors for trimming stems
- Ribbon or string for hanging (optional)
A note: use dried flowers, not fresh ones. Fresh flowers wilt inside the ornament and the whole thing gets sad and brown. Ask me how I know. Actually, you know what — don't.
Step-by-Step Directions
- Set up a clean, flat workspace with all your materials within reach. Put on some music. This one deserves a soundtrack.
- Choose your dried flowers, mixing colors and shapes that look good together. Trim any long stems short.
- Using the paintbrush, spread a thin layer of clear glue over the inside surface of the glass ornament. Work through the opening — take your time.
- Gently place your selected flowers against the glue, pressing them lightly so they stick. Arrange them like a tiny garden.
- Once you're happy with the arrangement, brush another thin layer of glue over the flowers to seal them in place. This adds a lovely translucent depth.
- Set the ornament aside to dry completely — a few hours is usually enough.
- Thread ribbon through the cap for hanging, and find the perfect spot on the tree.
The Learning Behind This Craft
This is a quiet lesson in preservation and patience. The flowers have to be handled gently, the glue has to be thin and even, and rushing any step shows in the final result. My kids learned to slow down and really look at what they were making — which colors sat well together, how much was too much.
There's also a little botany hiding in there. We ended up identifying every flower we used, and my daughter now knows more about pressed-flower varieties than I do.
Tips If Things Go Sideways
Flowers sliding around? Your glue layer is too thick. Thin, even coats are the secret — you can always add a second layer.
Bubbles trapped under the flowers? Gently press from the center outward with the back of the brush to push them out before the glue sets.
Glue looks cloudy? It dries clearer than it looks when wet. Give it the full drying time before you judge.
Fun Variations to Try
- Add a drop of food coloring to the clear glue for a softly tinted background behind the flowers.
- Layer different flower types for a more textured, meadow-like look.
- Tuck a tiny handwritten note or a small photo inside for a keepsake ornament.
- Gather seasonal materials — autumn leaves, winter pine sprigs — and make a set for each season.
FAQs
Can I use fresh flowers instead of dried?
I'd really recommend dried. Fresh flowers wilt quickly inside the ornament and won't adhere well. Dried flowers keep their color and shape for years.
How long will these last?
With careful handling and proper storage, many years. Wrap them in tissue paper when you pack the tree away and they'll look just as good next December.
How do I clean them?
Just wipe gently with a soft cloth. Skip harsh cleaners — they can damage the glue finish.
What if I don't have a paintbrush?
A small sponge, a cotton swab, or even a folded paper towel corner works for spreading the glue.
Can kids do this on their own?
Older kids, absolutely — there are no hot or sharp tools involved. Younger ones will need help with the fiddly flower placement through the small opening.

 Sunflower Chocolate Mother’s Day Card
 Easter Footprint Keepsakes: Easy Toddler Craft
 DIY Ghost Costume for Kids: Easy No-Sew Halloween Costume
 Easy Rainbow Glow Ghost Mason Jar Lanterns for Kids
Leave a Reply