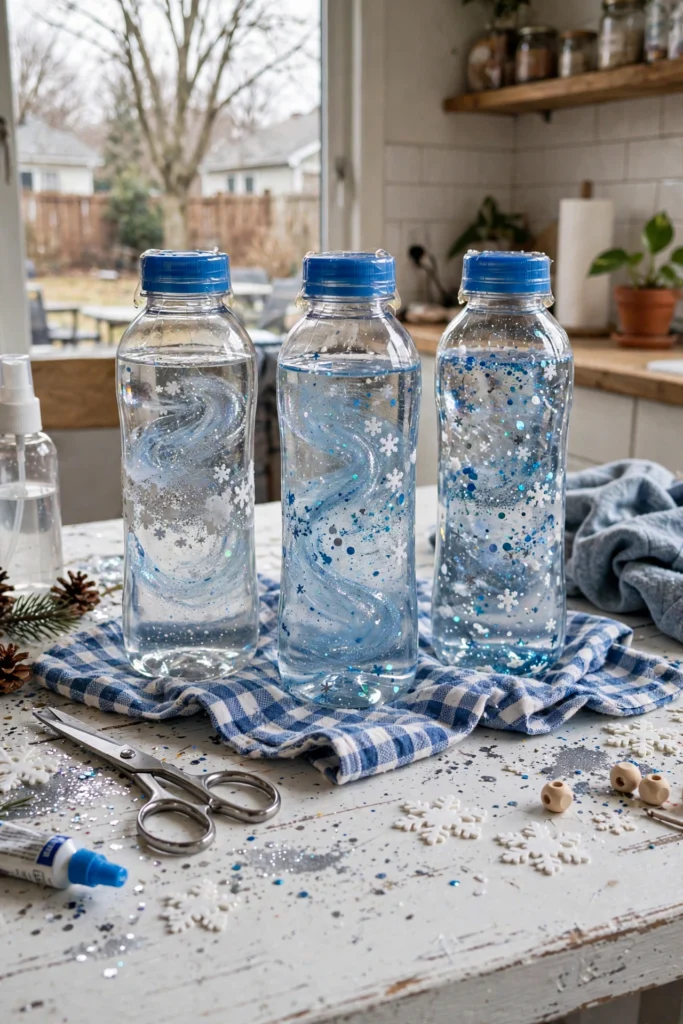
Confession time: I used to think sensory bottles were just for babies. Then one chaotic winter afternoon, my older daughter made one with clear glue and glitter, and she sat there shaking it and staring at it for a solid twenty minutes. Twenty minutes of calm. In my house. I was converted on the spot.
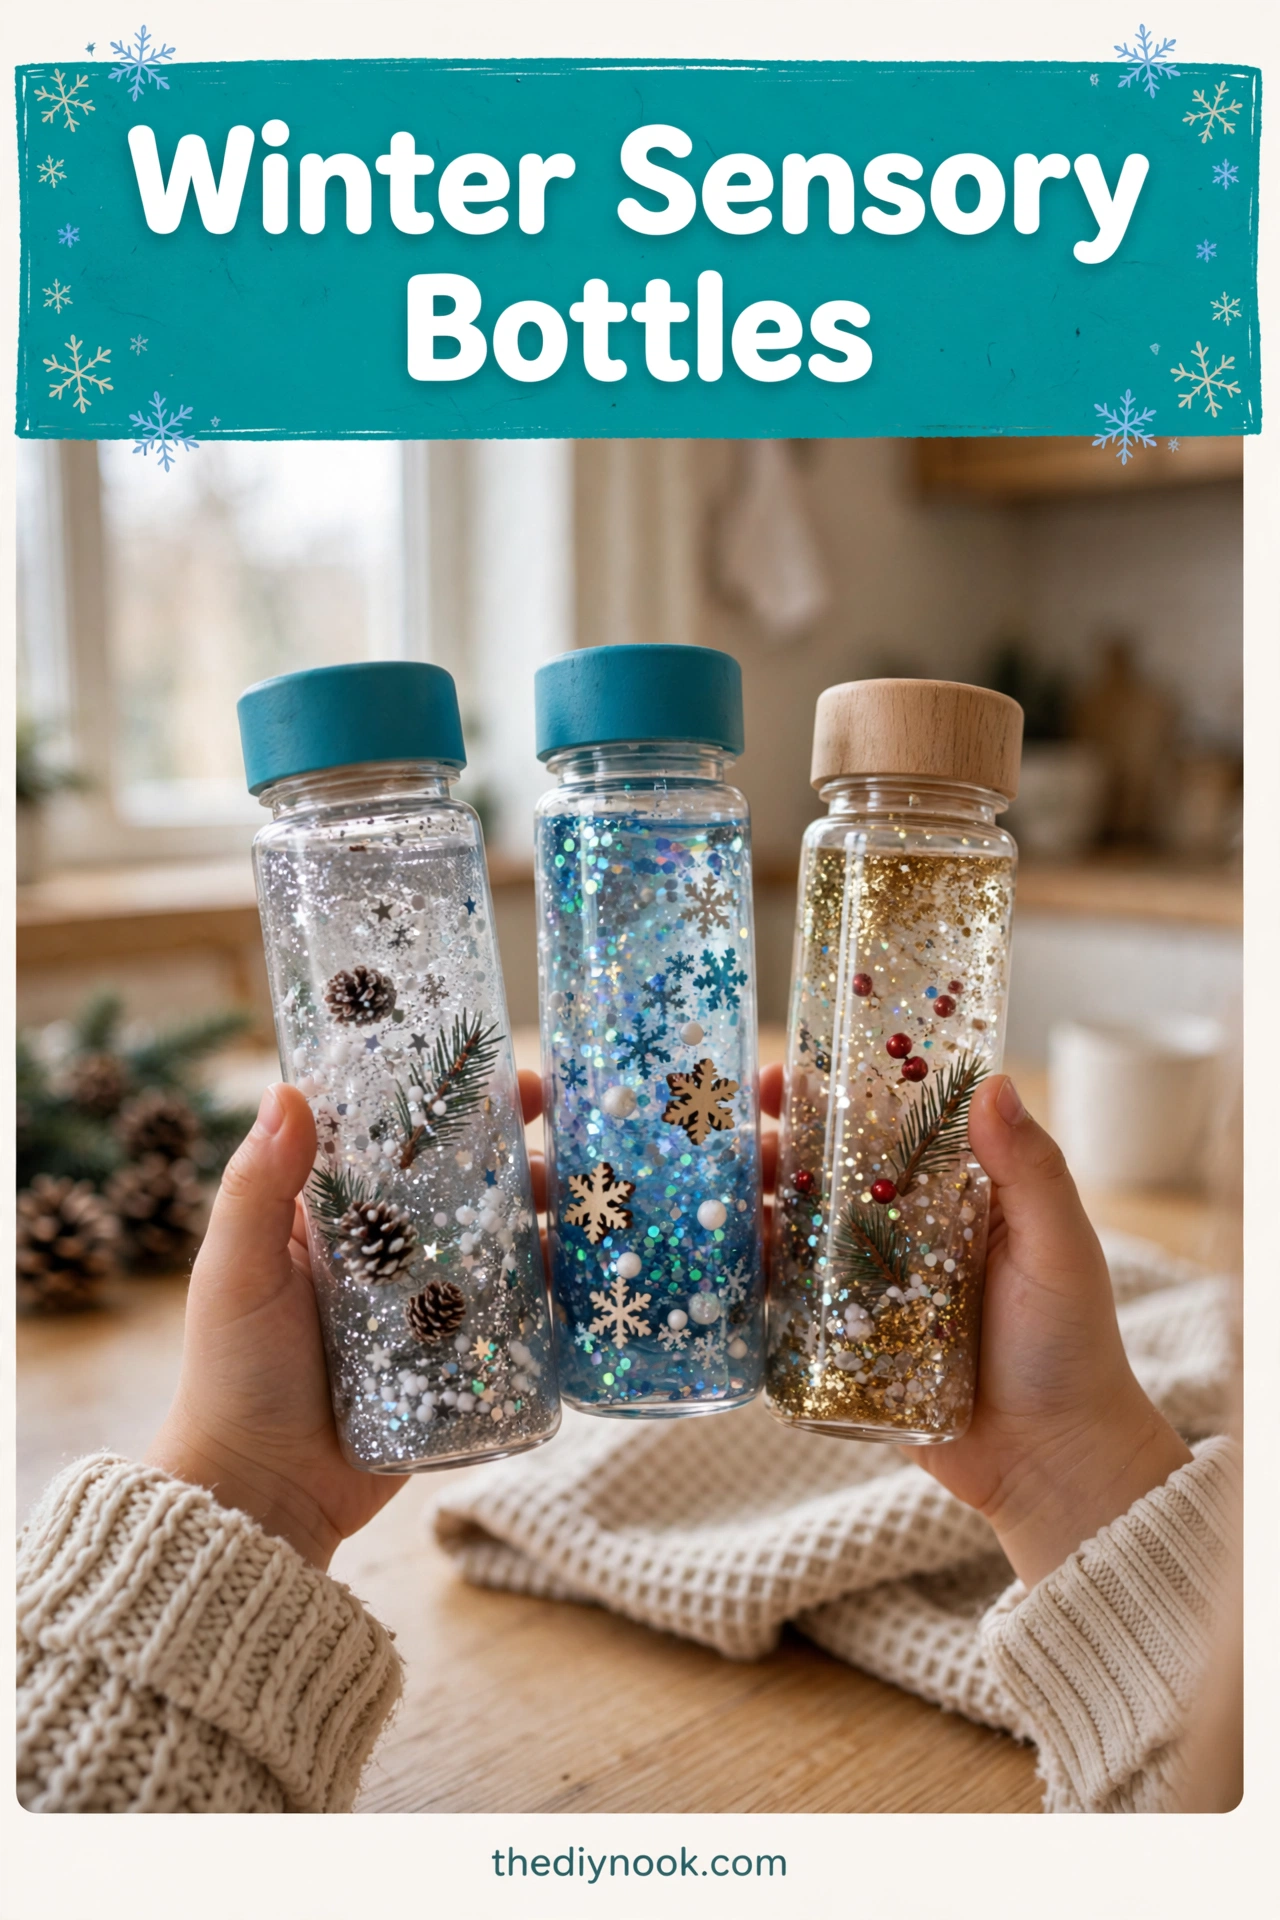
Winter sensory bottles are like little snow globes you make yourself — minus the glass, minus the risk of your toddler launching it across the room. Fill a bottle with glittery "snow," tiny winter trinkets, and colored water, and you've got a mesmerizing calm-down tool that works for kids AND stressed-out moms. Not that I shake it when the kids aren't looking. Okay, I do.
Why You'll Love Making These
They're ridiculously easy — like, ten minutes easy — and they keep kids entertained long after the crafting is done. Toddlers shake them and watch. Older kids customize them with tiny treasures. And there's genuine sensory value: watching glitter swirl and settle is legitimately calming, which makes these perfect for the overstimulated hours between school and dinner.
They also make great travel toys. Toss one in your bag for a restaurant or a long car ride and watch the magic happen. My youngest's bottle has survived three road trips and countless restaurant meltdowns.
Materials You'll Need
- Empty clear plastic bottle (12 oz or larger — a clean water or soda bottle works)
- Clear glitter or faux snow
- Water (tinted with a drop of food coloring if you want color)
- Small winter-themed items (mini pinecones, snowflake confetti, beads)
- Glycerin (optional — it slows the glitter down for a dreamier effect)
- A funnel for easy filling
- Hot glue gun (to seal the top)
A funnel makes this so much easier — glitter + bottle neck without one is a recipe for sparkle countertops.
<img src="https://thediynook.com/wp-content/uploads/2026/09/pin-v1-17.webp" alt="Create Your Own Winter Sensory Bottles for Cozy Fun!" />
Step-by-Step Directions
- Clean your plastic bottle thoroughly and peel off the label so you can see through it clearly.
- Using a funnel, pour in clear glitter or faux snow — this is your "snow."
- Drop in your small winter-themed items: mini pinecones, snowflake confetti, beads, tiny bells. Arrange them however you like.
- Fill the bottle with water, leaving a little space at the top. Add a drop of blue food coloring if you want an icy tint.
- If you have glycerin, stir in a few drops now — it makes the glitter fall slower and more mesmerizingly.
- Screw on the cap and seal it with hot glue around the edge. This step is non-negotiable if small kids will be shaking it — trust me.
- Give it a gentle shake and watch your winter wonderland swirl and settle.
The Learning Behind This Craft
Sensory bottles are genuinely therapeutic tools — the slow swirl of glitter gives kids something visual to focus on, which helps big feelings settle. Occupational therapists use them for a reason! It's a little mindfulness practice disguised as a toy.
Kids also practice pouring, measuring, and fine motor control with the funnel and tiny items. And if you add glycerin, you've got a mini science moment: thicker liquid means slower movement. My daughter now explains viscosity to people at parties. She's seven.
Tips If Things Go Sideways
Glitter falling too fast? Add more glycerin — a tablespoon or two makes a huge difference. Clear glue works as a substitute too.
Cap leaking? Add another ring of hot glue around the cap edge, and let it cool fully before little hands grab it.
Bottle too cloudy? You probably added too much glitter or didn't clean the bottle well. A clean bottle and a tablespoon of glitter is the sweet spot.
Everything clumping together? A drop of dish soap helps break up clumps. Who knew.
Fun Variations to Try
- Add tiny bells or beads for a sound element — shake and listen.
- Make themed bottles: Christmas (red/green glitter + tiny tree), New Year's (gold glitter + stars), or pure snowstorm (white everything).
- Try different liquids: baby oil for a lava-lamp effect, or clear hand soap for extra-slow movement.
- Hide tiny "treasures" in the glitter and make an I-spy game: shake and find them all.
- Make a matching set in different sizes for a whole family of winter bottles.
FAQs
Can I use a glass bottle instead of plastic? You can, but plastic is safer — especially if kids will be shaking, dropping, and inevitably throwing it.
What if I don't have glycerin? Skip it! The bottle still works beautifully. Clear glue or a little hand soap slows the glitter down too.
How long will it last? Indefinitely if sealed well. The contents may settle over time — just give it a shake and it's good as new.
Can I use regular water without coloring? Yes, but a drop of blue or teal food coloring really makes the winter scene pop. Your call.
Is this good for toddlers? Perfect for them — as long as the cap is sealed tight with hot glue. No small parts that can escape.
What size bottle works best? 12 ounces or bigger gives the best visual effect, but any clear plastic bottle works. We've used everything from tiny juice bottles to big soda bottles.

 Sunflower Chocolate Mother’s Day Card
 Easter Footprint Keepsakes: Easy Toddler Craft
 DIY Ghost Costume for Kids: Easy No-Sew Halloween Costume
 Easy Rainbow Glow Ghost Mason Jar Lanterns for Kids
Leave a Reply